Incubator for Eggs Excellence: A Deep Dive into Hatching Success!
Table of Contents
I. Introduction:
Embark on a revolutionary poultry adventure as we unveil the latest in egg incubation technology. In the world of poultry farming, ensuring a perfect environment for hatching eggs is paramount. Our article, “Incubator for Eggs Unveiled: Revolutionize Your Poultry Adventure!” delves into the realm of egg incubators, offering insights into cutting-edge products and essential accessories.
Whether you’re a seasoned farmer or a beginner, this comprehensive guide will equip you with the knowledge to revolutionize your poultry endeavors. Discover the diverse types of incubators, featured products, and crucial accessories that will elevate your hatchery game. Get ready to transform your poultry journey – let’s hatch success together!
II. Types of Egg Incubators
Egg incubators come in various types, each catering to specific needs and preferences. Understanding the distinctions between automatic, manual, and semi-automatic models is crucial for selecting the ideal incubator for your poultry venture.
A. Automatic Incubators
Rcom Mini Pro Incubator:
An advanced automatic incubator known for its precision and efficiency.
Features automatic egg turning and a built-in candler for hassle-free monitoring.
Brinsea Mini II Advance Incubator:
Boasts automatic egg turning and an intuitive digital interface.
Ideal for those seeking a user-friendly incubator with cutting-edge technology.
River Systems ET Super 12 Digital Incubator:
A fully automated incubator equipped with digital controls for temperature and humidity.
Suitable for larger egg batches with its 12-egg capacity.
Rcom 10 PRO-Plus (Automatic) - Built-in Candler:
Combines automation with a built-in candler for efficient monitoring of embryo development.
Perfect for those who prioritize ease of use and advanced features.
B. Manual Incubators
Brinsea Mini II Eco Incubator:
A manual incubator offering simplicity and reliability.
Requires manual egg turning and is an excellent choice for beginners.
Brinsea Maxi II Eco Incubator:
A larger capacity manual incubator suitable for more extensive poultry projects.
offers an economical solution without sacrificing quality.
Brinsea Mini II EX Incubator:
Manual operation with an added egg turning cradle for convenience.
Offers a balance between manual control and enhanced features.
Brinsea Maxi II Advance Incubator:
Manual turning with advanced features like digital temperature control.
Ideal for those who prefer a hands-on approach with some automation.
C. Semi-Automatic Incubators
River Systems ET 12 Incubator:
A semi-automatic incubator with features like temperature control and manual egg turning.
Strikes a balance between manual involvement and automated functionality.
River Systems ET 24 Incubator:
Similar to the ET 12 but with a larger egg capacity of 24.
Perfect for those who want a semi-automatic incubator with increased capacity.
Understanding the characteristics of each type empowers poultry enthusiasts to make informed decisions based on their specific needs and preferences. Whether opting for the convenience of automatic models or the hands-on control of manual incubators, the right choice sets the foundation for a successful hatchery.
III. Featured Products
In the vast landscape of egg incubators, certain standout products have garnered attention for their innovative features, reliability, and performance. Let’s explore some of the featured products that can elevate your egg incubation experience.
A. Chicktec Smart 20 Automatic Incubator £199.00:
Known for its intelligent design, this automatic incubator offers a capacity of 20 eggs.
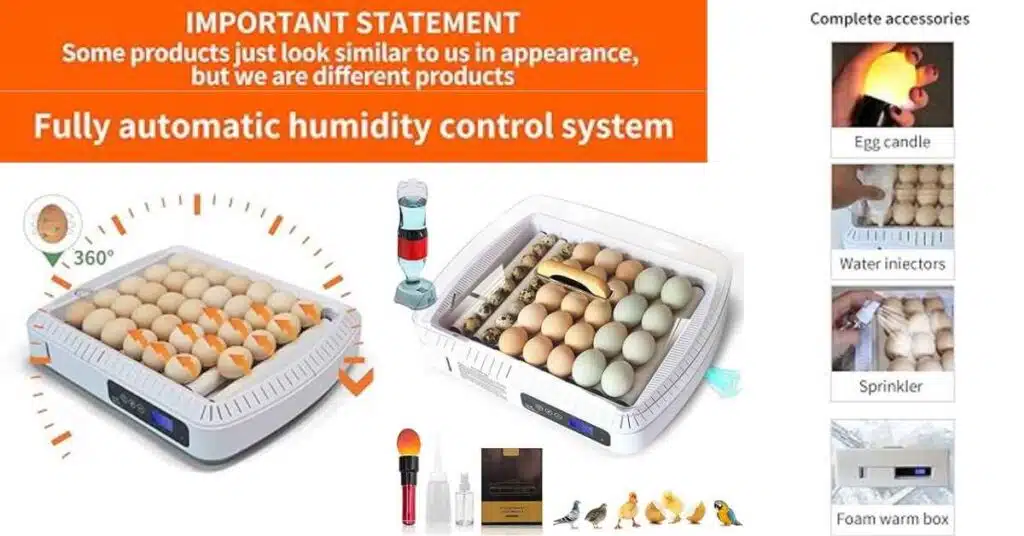
Features a fully automatic egg turner and humidity control for optimal hatching conditions.
B. QMCAHCE Automatic Egg Incubator:
A digital incubator with a fully automatic turner suitable for hatching various bird eggs.
Equipped with humidity control, providing a controlled environment for successful incubation.
C. Harris Manna Pro Farms Nurture Right Incubator:
This incubator boasts a 360-degree view for easy observation of the hatching process.
Designed for efficiency, it ensures a nurturing environment for developing embryos.
D. Linklife Egg Incubator for Hatching Chicks, 8 Eggs Poultry Hatcher:
Featuring a unique little train shape, this incubator combines aesthetics with functionality.
Equipped with LED lighting and intelligent temperature control for optimal hatchery conditions.
E. TRIOCOTTAGE 12 Clear Egg Hatching Incubator with Automatic Egg Turning:
A clear incubator providing a transparent view of the hatching process.
Offers automatic egg turning and auto water replenishment for user convenience.
F. Okköbi OBI-12 Egg Incubator for Hatching Chickens, Ducks & Other Birds:
A versatile incubator suitable for various bird species, equipped with automatic egg turning.
Features temperature control, humidity display, and an integrated egg candler for monitoring.
G. AZXIVIZ Egg Incubator, 8 Eggs Poultry Hatcher with Humidity Temperature Control:
Compact and efficient, this incubator is designed for hatching up to 8 eggs.
Offers precise control over humidity and temperature for successful incubation.
H. Meuiosd Egg Incubator for Hatching Chicks, 12-24 Egg Incubators with Auto Turning:
A user-friendly incubator with automatic egg turning and Fahrenheit display.
Provides a 360-degree view for easy monitoring and auto water top-up for convenience.
I. DETODDA 18-60 Eggs Incubators for Hatching Eggs:
Versatile incubator accommodating a wide range of eggs with automatic turning.
Includes an egg candler and automatic features for efficient hatchery management.
J. XYLUCKY Egg Hatching Incubator, Fully Digital Automatic Hatcher:
With a capacity of 560 eggs, this industrial-grade incubator is fully digital for precision.
Suitable for various bird species, offering automated egg turning and temperature control.
Exploring these featured products provides poultry enthusiasts with insights into the diverse options available in the market. Whether prioritizing capacity, automation, or unique design features, these products cater to different preferences, ensuring a successful and enjoyable egg incubation experience.
IV. Essential Accessories

Beyond the incubators themselves, several essential accessories play a crucial role in enhancing the efficiency and effectiveness of the egg incubation process. These accessories contribute to monitoring, maintaining, and optimizing the incubation environment, ensuring a higher success rate in hatching.
A. LCD Digital Incubator Chicken Bird Egg Hatching Sensor:
This digital sensor provides accurate readings of temperature and humidity within the incubator.
Essential for maintaining optimal conditions, allowing hatchers to make timely adjustments.
B. LED Egg Candler Cool Light Egg Candler & Tester:
A handheld device with cool LED light for candling eggs, allowing observation of embryo development.
Facilitates the identification of viable eggs and aids in removing non-viable ones.
C. Incubator Heater Tube Heating Element:
A 200W heating element designed for maintaining consistent warmth within the incubator.
Essential for regulating temperature and creating an ideal environment for egg development.
D. Brinsea Ovaview Egg Candler (HIGH-INTENSITY):
A high-intensity egg candler designed for use with various egg sizes.
Enables detailed inspection of developing embryos, ensuring their health and progress.
E. Automatic Egg Incubator Temperature Controller:
A device that precisely controls the temperature within the incubator.
Ensures that the environment remains within the optimal range for successful incubation.
F. Egg Incubator Controller Thermostat Automatic Temperature Humidity Controller:
A comprehensive controller that maintains both temperature and humidity levels.
Essential for creating a stable and controlled environment conducive to successful hatching.
G. LED Egg Tester Cold Light Incubation Flashlight:
A handheld flashlight designed for candling eggs with a focus on portability.
Enables quick and efficient examination of developing embryos.
H. Automatic Egg Incubator Temperature Controller with Precise Temperature Sensor:
A temperature controller with a precise sensor for accurate temperature regulation.
Essential for preventing fluctuations and ensuring a stable incubation environment.
I. Eggs Incubator Trays - Automatic Egg Turner:
Automatic egg turner trays designed for various egg sizes.
Facilitates regular and gentle turning, promoting even development of embryos.
J. Cultivation Heating Lamp Thermostat Fan Heater 100-300w Egg Reptile:
A versatile heating lamp with a fan and thermostat, suitable for egg incubation.
Provides consistent warmth and ensures a stable environment for the incubation process.
These essential accessories complement the functionality of egg incubators, contributing to the success of the hatching process. Incorporating these tools into your incubation setup enhances precision, monitoring, and control, ultimately increasing the chances of a successful and healthy hatch.
V. Selecting the Right Incubator for Your Needs
Choosing the right egg incubator is a critical decision that significantly impacts the success of your poultry venture. Considerations such as capacity, automation level, and additional features play a crucial role in determining the incubator that best suits your needs. Here’s a guide to assist you in making a wise choice:
A. Capacity:
Small-Scale Operations:
For beginners or small-scale operations, incubators with a lower egg capacity (e.g., 8 to 12 eggs) are suitable.
Examples include the Linklife Egg Incubator and Harris Manna Pro Farms Nurture Right Incubator.
Medium to Large-Scale Operations:
If you’re managing a larger flock, consider incubators with higher capacities (e.g., 20 to 560 eggs).
Options like the Chicktec Smart 20 and XYLUCKY Egg Hatching Incubator cater to medium to large-scale operations.
B. Automation Level:
Automatic Incubators:
Ideal for those seeking convenience and less hands-on involvement.
Automatic models, such as the Rcom Mini Pro and Brinsea Mini II Advance, feature automated egg turning and temperature control.
Manual Incubators:
Suitable for individuals who prefer more control over the incubation process.
Manual models like the Brinsea Mini II Eco and Brinsea Maxi II Eco require manual egg turning but offer reliability and simplicity.
Semi-Automatic Incubators:
Strike a balance between automation and manual control.
Examples include the River Systems ET 12 and River Systems ET 24, providing some automation with room for user intervention.
C. Additional Features:
Built-in Candlers:
Some incubators come with built-in candlers, like the Rcom 10 PRO models, facilitating easy monitoring of embryo development.
LED Egg Candling:
Accessories like LED egg candlers (e.g., LED Egg Candler Cool Light) are valuable for examining eggs during incubation.
Digital Displays:
Incubators with digital displays, such as the Brinsea Maxi II Advance, offer precise temperature control and easy monitoring.
Humidity Control:
For optimal hatchery conditions, choose incubators with humidity control, like the QMCAHCE Automatic Egg Incubator.
360-Degree View:
Incubators such as the Harris Manna Pro Farms Nurture Right provide a 360-degree view, allowing thorough observation of the hatching process.
D. User Experience:
Beginner-Friendly:
If you’re new to incubation, opt for models like the Brinsea Mini II Eco, known for their user-friendly design and ease of operation.
Advanced Features:
Experienced hatchers might prefer advanced features, such as those found in the Rcom 10 PRO-Plus models, offering advanced automation and built-in candlers.
Consider your specific requirements, preferences, and the scale of your operation when selecting an incubator. Whether you prioritize automation, capacity, or additional features, choosing the right incubator sets the stage for a successful and rewarding poultry adventure.
VI. Incubation Process Tips
Successfully hatching eggs requires more than just selecting the right incubator; it involves meticulous attention to the incubation process. Follow these steps and tips to maximize the chances of a successful hatch:
A. Step 1: Gather Your Supplies:
Ensure you have all necessary supplies before starting the incubation process.
Items include the incubator, thermometer, hygrometer, egg turner (if not built-in), and any additional accessories.
B. Step 2: Assemble the Frame:
Properly assemble the incubator frame according to the manufacturer’s instructions.
Check for any loose components or malfunctions before proceeding.
C. Step 3: Attach Screen to Frame:
Attach the appropriate screens or trays inside the incubator to hold the eggs securely.
Ensure proper alignment and spacing to prevent overcrowding.
D. Step 4: Install Lightbulb:
If your incubator requires an external heat source, install the lightbulb or heating element.
Test the heating element to ensure it reaches and maintains the desired temperature.
E. Step 5: Cut Ventilation Holes:
Ensure proper ventilation by cutting or adjusting ventilation holes in the incubator.
Adequate airflow is crucial for maintaining optimal conditions inside.
F. Step 6: Final Assembly:
Double-check all components for proper assembly and functionality.
Ensure that the incubator is clean and sanitized to provide a hygienic environment for the eggs.
G. Step 7: (Optional) Install a Viewing Window:
Some incubators come with viewing windows, allowing you to observe the hatching process.
If applicable, ensure the window is clean and provides a clear view.
H. Step 8: Incubating Tips:
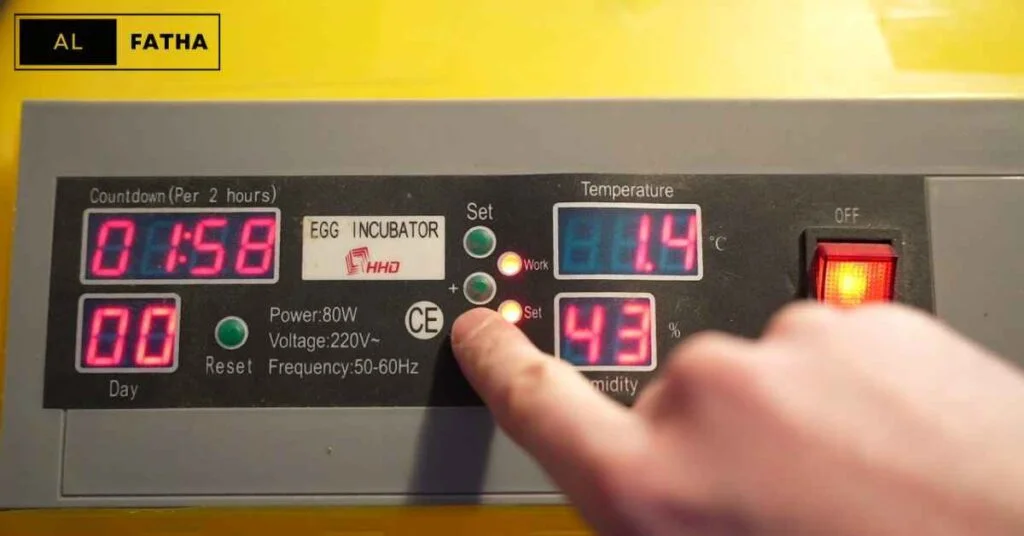
Temperature:
Monitor and maintain the temperature according to the requirements of the specific eggs you are incubating.
Regularly check the accuracy of the incubator’s thermometer.
Humidity:
Adjust humidity levels based on the recommendations for the type of eggs you are incubating.
Use a hygrometer to measure humidity accurately.
Turning Eggs:
If your incubator doesn’t have a built-in egg turner, manually turn the eggs at least three times a day.
Ensure gentle handling to avoid damaging the developing embryos.
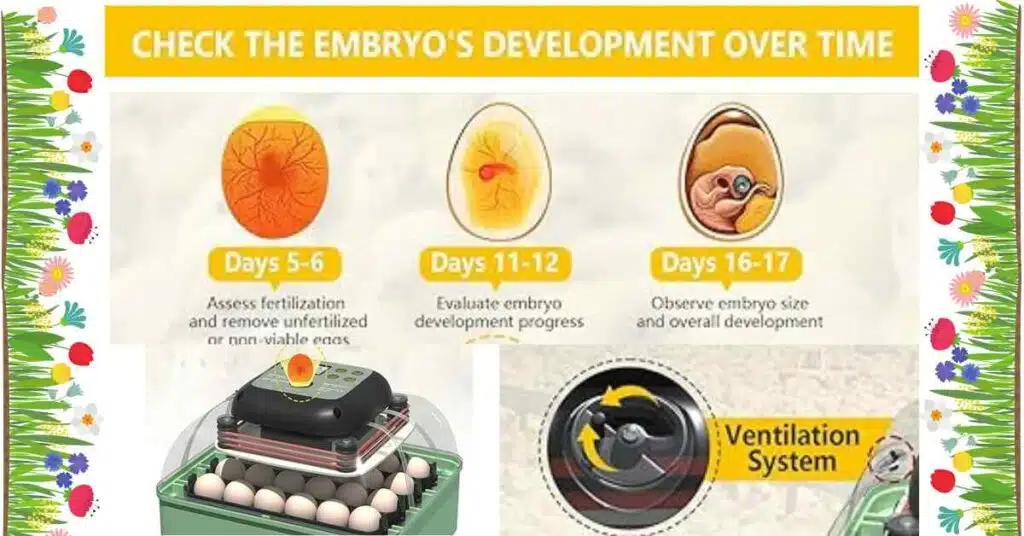
Candling:
Perform regular egg candling using a candler or flashlight to monitor embryo development.
Remove any eggs showing signs of non-viability.
Record Keeping:
Maintain a record of key incubation parameters, including temperature, humidity, and any observations.
This record helps troubleshoot issues and refine your incubation process for future hatches.
Final Days Preparation:
In the final days before expected hatching, cease turning the eggs.
Increase humidity slightly to create an optimal environment for the chicks to hatch.
Post-Hatch Care:
Once the chicks hatch, move them to a brooder for warmth, food, and water.
Clean and disinfect the incubator for future use.
By diligently following these incubation process tips, you enhance the likelihood of a successful hatch and contribute to the health and well-being of the newly hatched chicks. The incubation process is a delicate and rewarding phase that demands attention to detail and adherence to best practices.
VII. Maintaining a Healthy Poultry Flock

Ensuring the health and well-being of your poultry flock extends beyond the incubation process. Proper management, nutrition, and biosecurity are essential aspects of maintaining a thriving and disease-resistant poultry population. Here’s a comprehensive guide to help you achieve and sustain a healthy flock:
A. Management:
Routine Health Checks:
Conduct regular health checks on your poultry to identify any signs of illness or distress.
Monitor for changes in behavior, feather condition, and overall vitality.
Vaccination Programs:
Implement a vaccination program based on the specific needs and prevalent diseases in your region.
A veterinarian should be consulted to determine the proper vaccination schedule.
Isolation of Sick Birds:
In order to stop infections from spreading, separate any birds exhibiting symptoms of illness as away.
Provide appropriate medical care or seek professional veterinary assistance.
Cleanliness and Sanitation:
Maintain clean and sanitized living conditions for your poultry.
Regularly clean housing, nesting areas, and feeders to minimize the risk of infections.
B. Nutrition:
Balanced Diet:
Provide a well-balanced and nutritionally complete diet for your poultry.
Consider age-specific nutritional requirements for chicks, layers, and broilers.
Access to Clean Water:
Ensure constant access to clean and fresh water for all poultry.
Hydration is crucial for overall health, egg production, and growth.
Supplementation:
Consider supplemental feed or additives based on the specific needs of your flock.
Consult with a poultry nutritionist for guidance on optimal supplementation.
Feeding Schedule:
To encourage wholesome eating practices, provide a regular feeding plan.
Avoid overfeeding or underfeeding, and monitor feed consumption.
C. Poultry Diseases:
Early Detection:
Learn to recognize early signs of common poultry diseases, such as respiratory distress, abnormal droppings, or lethargy.
Promptly address any suspected illnesses to prevent the spread of infections.
Quarantine New Additions:
Before adding additional birds to the current flock, place them in quarantine.
This preventive step aids in preventing the spread of illnesses.
Consult with Veterinarians:
Establish a relationship with a poultry veterinarian for regular health consultations.
Seek professional advice in case of disease outbreaks or health concerns.
D. Biosecurity:
Restricted Access:
Limit access to your poultry area to essential personnel only.
Minimize the risk of disease introduction by controlling visitor access.
Footbaths and Sanitizers:
Install footbaths with disinfectant solutions at entry points to reduce the spread of contaminants.
Provide hand sanitizers for personnel and visitors.
Separation of Age Groups:
Separate different age groups within the flock to prevent cross-contamination.
Implement strict biosecurity measures when moving between groups.
Rodent and Pest Control:
Implement measures to control rodents and pests around the poultry area.
These animals can transmit diseases and compromise the biosecurity of the flock.
Maintaining a healthy poultry flock requires a proactive approach to management, nutrition, disease prevention, and biosecurity. Regular monitoring, prompt intervention in case of health issues, and adherence to biosecurity protocols contribute to the long-term well-being and productivity of your poultry.
VIII. Maximizing Egg Production and Quality

Efficient egg production is a key goal for poultry farmers, whether for personal consumption or commercial purposes. To maximize egg production and ensure high-quality eggs, careful attention to breeding, environment, nutrition, and egg handling practices is essential. Here’s a comprehensive guide to help you achieve optimal egg production and quality:
A. Breeding:
Selecting Quality Breeding Stock:
Choose breeding stock with desirable traits, such as high egg production, good health, and strong genetics.
Regularly assess and cull unproductive or genetically undesirable individuals.
Breeding Programs:
Implement a well-structured breeding program to enhance specific traits in your flock.
Consider factors like egg size, shell strength, and resistance to common diseases.
B. Environmental Considerations:
Optimal Housing Conditions:
Provide clean, well-ventilated, and appropriately sized housing for your flock.
Adequate space and proper nesting areas encourage laying behavior.
Lighting Management:
Implement a consistent lighting schedule to simulate natural daylight.
Ensure a minimum of 14 hours of light per day to stimulate egg production.
Temperature Control:
Maintain a comfortable temperature in the coop, as extremes can disrupt egg-laying patterns.
Adequate insulation and ventilation are crucial for temperature control.
C. Nutrition for Egg Production:
Balanced Diet:
Offer a well-balanced and nutrient-dense diet to support optimal egg production.
Adjust feeding programs based on the specific needs of layers.
Calcium Supplementation:
Ensure a reliable source of calcium in the diet for strong eggshells.
Oyster shell supplements are commonly used to meet calcium requirements.
Protein Content:
Adjust protein levels in the diet based on the life stage of the birds.
Higher protein content is essential for growing chicks, while layers require less.
D. Egg Handling Practices:
Prompt Collection:
Collect eggs promptly after laying to prevent them from becoming soiled or damaged.
Frequent collection also reduces the risk of egg-eating behavior in the flock.
Clean and Sanitary Conditions:
Maintain clean nesting boxes and coop bedding to prevent contamination.
Dirty eggs are more susceptible to bacterial growth and deterioration.
Proper Storage:
Store eggs in a cool and humidity-controlled environment.
Refrigeration is recommended for long-term storage and to maintain egg quality.
Regular Inspection:
Regularly inspect eggs for abnormalities, cracks, or irregularities.
Remove any damaged or abnormal eggs to ensure only quality eggs are consumed or sold.
E. Health Monitoring:
Disease Prevention:
Implement biosecurity measures to prevent the introduction of diseases that can impact egg production.
Regular health checks and vaccination programs contribute to overall flock health.
Parasite Control:
Control internal and external parasites that can affect the health of the flock.
Routine deworming and pest control measures are crucial.
Maximizing egg production and quality requires a holistic approach that encompasses breeding, environmental considerations, nutrition, egg handling practices, and health monitoring. By carefully managing these aspects, you can establish a consistent and reliable egg production system that meets both personal and commercial demands.
IX. Advanced Incubation Technologies

In recent years, advancements in technology have revolutionized the field of poultry incubation. These cutting-edge technologies offer precise control over environmental conditions, improved hatch rates, and enhanced monitoring capabilities. Explore the latest innovations that can take your incubation process to the next level:
A. Automated Egg Turning Systems:
Continuous Turning:
Some modern incubators feature automated egg turning systems.
Continuous and gentle turning of eggs helps ensure even embryonic development.
Programmable Settings:
Adjustable turning intervals and angles can be programmed based on the specific needs of different poultry species.
B. Temperature and Humidity Control:
Precision Control:
Advanced incubators come equipped with sophisticated temperature and humidity control systems.
Precise regulation of these factors is crucial for optimal embryo development.
Real-time Monitoring:
Integrated sensors and digital displays provide real-time data on temperature and humidity levels.
This allows for immediate adjustments and ensures consistent conditions.
C. Remote Monitoring and Control:
Smart Incubators:
Some incubators are now equipped with smart technology.
Remote monitoring and control capabilities through mobile apps or web interfaces offer convenience and flexibility.
Alert Systems:
Receive alerts and notifications on your device in case of deviations from preset conditions.
This enables quick responses to potential issues, even when you are away from the incubator.
D. Artificial Intelligence (AI) Integration:
Automated Decision-making:
AI algorithms can analyze data from sensors and make real-time adjustments to optimize incubation conditions.
This can lead to more precise control and improved hatch rates.
Learning Capabilities:
AI systems can learn from past incubation cycles and adapt settings for future hatches.
Continuous learning contributes to enhanced efficiency over time.
E. Multi-stage Incubation Systems:
Customized Environments:
Multi-stage incubation involves creating different environments within the same incubator for eggs at various stages of development.
This allows customization of conditions to meet the specific needs of embryos at different developmental stages.
Improved Hatchability:
Eggs can be moved to different compartments based on factors such as age and size, resulting in improved hatchability.
F. Automated Candling and Monitoring:
High-tech Candling Devices:
Automated candlers use advanced imaging technology to monitor embryo development.
This reduces the need for manual candling and minimizes disturbance to the developing embryos.
Non-invasive Monitoring:
Continuous monitoring without physically opening the incubator ensures a stable environment.
Non-invasive monitoring contributes to higher hatch rates and healthier chicks.
G. Energy-efficient Incubators:
Environmentally Friendly Designs:
Some advanced incubators prioritize energy efficiency and eco-friendly features.
Energy-efficient models support both environmental sustainability and financial savings.
Insulation and Ventilation:
Improved insulation and ventilation systems reduce energy consumption while maintaining optimal conditions.
Energy-efficient designs often include eco-friendly refrigerants.
H. Customizable Hatching Profiles:
Species-specific Profiles:
Incubators with customizable hatching profiles allow users to select settings tailored to specific poultry species.
This ensures that the incubator provides the ideal conditions for various types of eggs.
User-friendly Interfaces:
Intuitive interfaces make it easy for users to input custom settings and profiles.
This feature is particularly beneficial for those hatching multiple poultry species.
Incorporating these advanced incubation technologies into your poultry farming venture can elevate your hatchery’s efficiency and overall success. Whether you are a small-scale farmer or managing a commercial operation, staying informed about the latest innovations ensures that you can make informed decisions to optimize your incubation processes.
X. Troubleshooting Common Incubation Issues
Even with the best equipment and practices, incubating eggs can sometimes present challenges. Recognizing and addressing common incubation issues is crucial for ensuring successful hatching outcomes. Here’s a guide to troubleshooting prevalent problems that may arise during the incubation process:
A. Low Hatch Rates:
Possible Causes:
Incorrect temperature or humidity levels.
Poor egg quality or fertility.
Inadequate turning of eggs.
Troubleshooting Steps:
Check and calibrate temperature and humidity settings.
Evaluate egg quality and fertility.
Ensure proper and consistent egg turning throughout the incubation period.
B. High Mortality Rate in Embryos:
Possible Causes:
Exposure to excessive temperature fluctuations.
Inadequate ventilation leading to high carbon dioxide levels.
Contamination or infection within the incubator.
Troubleshooting Steps:
Maintain stable temperature conditions.
Ensure proper ventilation and airflow within the incubator.
Regularly clean and disinfect the incubator to prevent contamination.
C. Malpositioned or Stuck Chicks:
Possible Causes:
Incorrect turning angles during incubation.
Inadequate humidity levels during the hatching phase.
Poor positioning of eggs during the hatching process.
Troubleshooting Steps:
Adjust turning settings for optimal angles.
Monitor and adjust humidity levels during the hatching phase.
Assist chicks that are struggling to hatch but avoid premature interference.
D. Uneven Hatch Timing:
Possible Causes:
Variations in temperature across different parts of the incubator.
Inconsistent turning resulting in uneven embryo development.
Eggs placed in different stages of fertility.
Troubleshooting Steps:
Ensure uniform temperature distribution within the incubator.
Implement regular and proper egg turning.
Group eggs with similar fertility stages together.
E. Abnormalities in Chicks:
Possible Causes:
Genetic issues.
Exposure to environmental stressors during incubation.
Contamination leading to developmental abnormalities.
Troubleshooting Steps:
Review breeding stock genetics and select for desirable traits.
Ensure a stable and stress-free environment during incubation.
Maintain a clean and sanitized incubator to prevent contamination.
F. Excessive Condensation on Eggshells:
Possible Causes:
Rapid temperature changes within the incubator.
Inadequate ventilation.
High humidity levels during the incubation period.
Troubleshooting Steps:
Gradually introduce temperature changes to avoid sudden fluctuations.
Ensure proper ventilation to prevent condensation.
Monitor and adjust humidity levels as needed.
G. Poor Egg Development:
Possible Causes:
Incorrect storage conditions before incubation.
Poor-quality eggs or eggs from aging hens.
Exposure to extreme temperatures during transportation.
Troubleshooting Steps:
Store eggs in optimal conditions before placing them in the incubator.
Select fresh and high-quality eggs from healthy hens.
Minimize temperature fluctuations during egg transportation.
H. Inconsistent Egg Turning:
Possible Causes:
Malfunctioning or inadequate egg turning mechanisms.
Uneven positioning of eggs within the turning trays.
User error or oversight in setting turning parameters.
Troubleshooting Steps:
Regularly inspect and maintain turning mechanisms.
Ensure proper alignment and positioning of eggs in turning trays.
Double-check and calibrate turning settings as needed.
I. Power Failures or Equipment Malfunctions:
Possible Causes:
Power outages or fluctuations.
Malfunctions in the incubator’s electrical components.
Inadequate backup power systems.
Troubleshooting Steps:
Install backup power sources, such as generators or uninterruptible power supplies (UPS).
Regularly inspect and maintain electrical components.
Develop contingency plans for potential power disruptions.
J. Egg Contamination:
Possible Causes:
Poor sanitation practices within the incubator.
Contaminated hands or tools during egg handling.
Inadequate cleaning of eggs before incubation.
Troubleshooting Steps:
Implement strict hygiene protocols for incubator maintenance.
Practice proper handwashing and tool sanitation.
Clean eggs thoroughly before placing them in the incubator.
Addressing these common incubation issues promptly and effectively is vital for maximizing hatch rates and producing healthy chicks. Regular monitoring, attention to environmental conditions, and adherence to best practices will contribute to a successful incubation process.
XI. Conclusion: Revolutionizing Your Poultry Adventure
In the dynamic realm of poultry farming, mastering the art of egg incubation stands as a pivotal gateway to a successful venture. This comprehensive guide has unraveled the intricacies of choosing the right incubator, optimizing environmental conditions, and overcoming common challenges.
By embracing cutting-edge technologies, understanding the nuances of breeding, and adopting meticulous practices, you are poised to revolutionize your poultry adventure. Whether you are a seasoned farmer or a novice embarking on this rewarding journey, the key to unlocking unparalleled success lies in the fusion of tradition and innovation.
As you embark on your poultry endeavor armed with the knowledge from this article, may your incubators hum with the promise of new life, and your flock flourish with vigor, transforming your poultry dreams into a thriving reality. Happy hatching!
XII. Frequently Asked Questions (FAQs) - Egg Incubators: Revolutionize Your Poultry Adventure!
Q1: Why is selecting the right incubator crucial for poultry farming?
A1: The choice of incubator significantly impacts hatch rates and overall poultry success. Selecting the right one ensures optimal environmental conditions for embryo development, leading to healthier chicks.
Q2: What are the key factors to consider when choosing an incubator?
A2: Considerations include capacity, automation level, temperature and humidity control, and advanced features like remote monitoring. Tailor your choice to match the specific needs of your poultry operation.
Q3: How can I optimize the incubation environment for better hatch rates?
A3: Maintain precise temperature and humidity levels, ensure proper egg turning, and invest in incubators with advanced features like automatic turning systems and real-time monitoring for optimal results.
Q4: What are some common incubation issues and how can they be addressed?
A4: Issues such as low hatch rates, malpositioned chicks, and uneven hatch timing can be addressed by adjusting environmental conditions, ensuring proper turning, and implementing best practices for hygiene and incubator maintenance.
Q5: How do advanced technologies like AI and smart incubators enhance the incubation process?
A5: Advanced technologies provide real-time monitoring, automated decision-making, and customization options. AI can optimize settings for improved hatch rates, while smart incubators offer remote monitoring and control for convenience.
Q6: What role does egg quality play in successful incubation?
A6: High-quality, fertile eggs are essential for successful incubation. Proper storage, handling, and selection of eggs contribute to better hatch rates and the health of the developing embryos.
Q7: How can I troubleshoot issues with egg turning and positioning during incubation?
A7: Regularly inspect and maintain turning mechanisms, ensure proper alignment of eggs in turning trays, and calibrate turning settings. Monitoring and adjusting as needed will address issues with turning and positioning.
Q8: What measures can be taken to address power failures or equipment malfunctions during incubation?
A8: Install backup power sources, regularly inspect and maintain electrical components, and develop contingency plans to minimize the impact of power failures or equipment malfunctions.
Q9: How can I create a biosecure environment in the incubation process?
A9: Implement strict hygiene protocols for incubator maintenance, practice proper handwashing and tool sanitation, and clean eggs thoroughly before placing them in the incubator to prevent contamination.
Q10: What is the key takeaway for a successful poultry adventure through incubation?
A10: Success lies in a harmonious blend of tradition and innovation. Mastering the fundamentals of incubation while embracing cutting-edge technologies will pave the way for a flourishing poultry venture. Happy hatching!