Can Battery Be Used in Incubator? Advancing Technology
Table of Contents
1. Introduction:
Innovations in incubation technology have opened new possibilities for poultry enthusiasts and laboratory researchers alike. One intriguing advancement is the utilization of battery power in incubators, offering flexibility and resilience in various settings.
This article explores the feasibility and benefits of battery-powered solutions, alongside DIY methods for creating incubators without relying on traditional electricity sources. Discover how these advancements are pioneering change in the world of incubation, offering practical solutions for diverse needs and environments.
2. DIY Incubation Methods:
DIY incubation methods provide an accessible and cost-effective approach for enthusiasts and small-scale breeders who want to hatch eggs without investing in commercial-grade equipment. These methods often involve repurposing common household items to create functional incubators. Below are several DIY incubation methods along with their construction and operation details:
Common Containers for DIY Incubators:
Insulated Food/Drink Coolers:
- Coolers make excellent incubator containers due to their insulation properties.
- To convert a cooler into an incubator, drill holes for ventilation and wiring, and install a transparent window for observation.
- Place a heat source, such as a heat bulb or heat tape, inside the cooler to provide consistent warmth.
- Monitor temperature and humidity levels closely to ensure optimal conditions for egg incubation.
Styrofoam Boxes:
- Styrofoam boxes are lightweight and easy to modify for incubation purposes.
- Cut a hole in the lid of the box to accommodate a heat source and ventilation.
- Line the interior of the box with a waterproof material to prevent moisture damage.
- Install a thermostat and thermometer to regulate temperature and monitor conditions.
DIY Styro Insulation Container:
- Create a custom insulation container using layers of styrofoam insulation panels.
- Assemble the panels to form a box-like structure, leaving space for ventilation and access.
- Install a heat source, thermostat, and thermometer according to the desired specifications.
- Seal any gaps or openings to maintain temperature and humidity levels effectively.
Repurposed Refrigerator/Freezer:
- Old refrigerators or freezers can be repurposed into large-scale incubators for hatching multiple eggs.
- Remove shelves and drawers to create space for egg trays.
- Install heating elements evenly throughout the interior to ensure uniform warmth.
- Utilize a digital thermostat with precise temperature control for accurate incubation.
3. Thermostat Options for Temperature Control:
Maintaining a stable temperature is crucial for successful egg incubation, as fluctuations can negatively impact hatch rates. Thermostats play a vital role in regulating temperature within an incubator, ensuring optimal conditions for embryo development. There are several thermostat options available for controlling temperature in DIY and commercial-grade incubators:
Mechanical/Analog Thermostats:
Description:
- Mechanical or analog thermostats rely on mechanical components to control temperature.
- They typically consist of a bimetallic strip or a gas-filled bulb that expands and contracts with temperature changes, triggering a switch to regulate the heating element.
Pros:
- Simple design and operation.
- Cost-effective option for basic incubation setups.
- Relatively durable and resistant to electrical malfunctions.
Cons:
- Less precise temperature control compared to digital thermostats.
- Limited features and customization options.
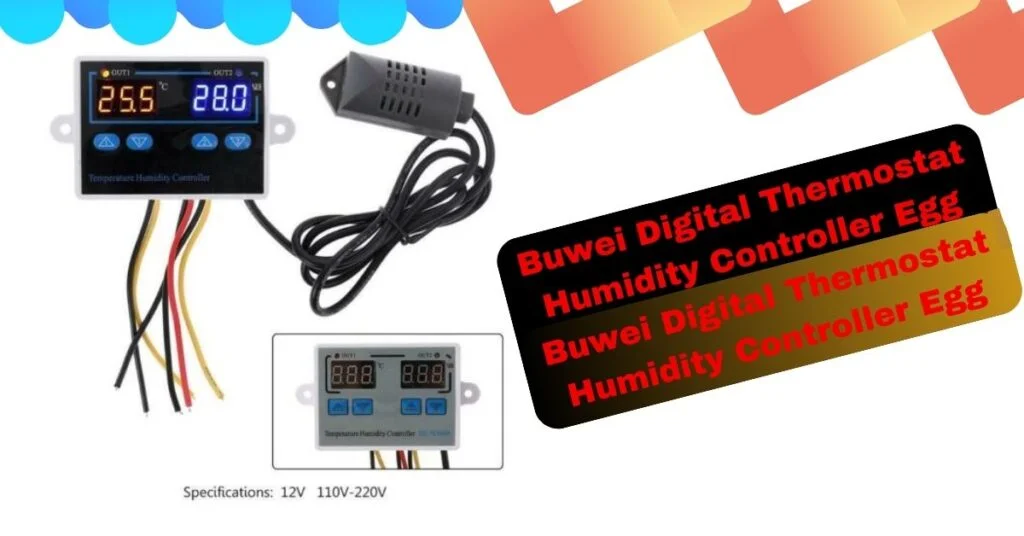
Digital Thermostats:
Description:
- Digital thermostats utilize electronic sensors and microprocessors to monitor and adjust temperature.
- They offer precise temperature control with programmable settings and digital displays for easy monitoring.
Pros:
- Accurate temperature control within tight tolerances.
- Programmable settings allow for customized temperature profiles.
- Digital displays provide real-time temperature readings for quick adjustments.
Cons:
- Higher cost compared to mechanical thermostats.
- Vulnerable to electrical malfunctions and circuit failures.
Pulse Proportional Thermostats:
Description:
- Pulse proportional thermostats use a series of short pulses to regulate temperature.
- They modulate the power supplied to the heating element based on temperature feedback, maintaining a stable temperature with minimal fluctuations.
Pros:
- Efficient energy usage, reducing overheating and temperature swings.
- Compatible with various heating elements, including heat bulbs, heat cables, and heat tape.
- Suitable for incubators with high thermal mass or large temperature differentials.
Cons:
- Complexity may require additional setup and calibration.
- Higher initial cost compared to basic thermostats.
4. Monitoring Temperature and Humidity:
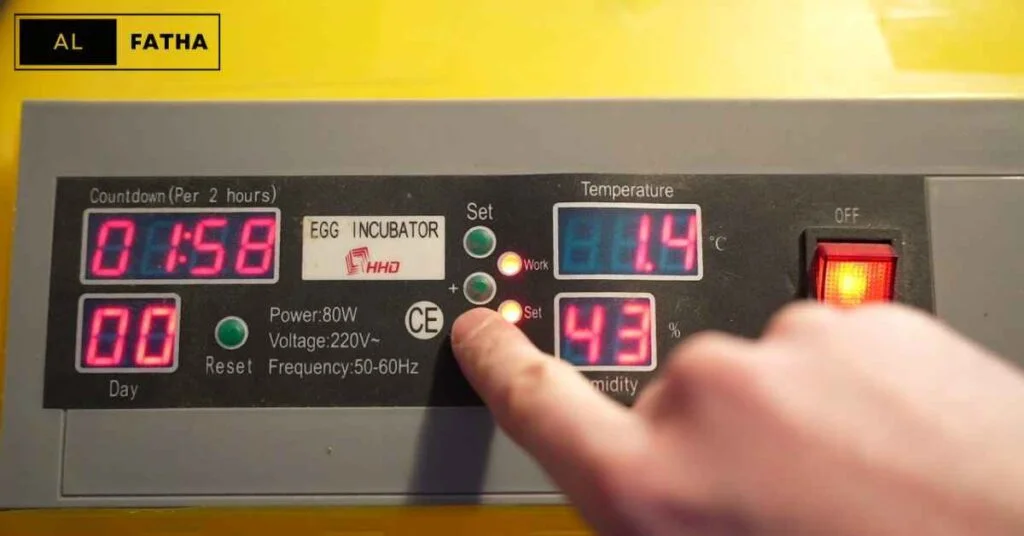
Monitoring temperature and humidity levels is critical for successful egg incubation, as slight variations can impact hatch rates and embryo development. Proper monitoring ensures that conditions remain within the optimal range for the duration of the incubation period. Here’s a detailed exploration of methods and tools for monitoring temperature and humidity in incubators:
Mechanical/Analog Thermometers:
Description:
- Mechanical or analog thermometers consist of a temperature-sensitive element, such as a bi-metallic coil or liquid-filled bulb, connected to a calibrated scale.
- They provide a visual indication of temperature through a pointer or dial.
Pros:
- Simple and easy to read.
- No reliance on batteries or electronic components.
- Generally durable and resistant to environmental factors.
Cons:
- Limited accuracy compared to digital thermometers.
- Gradual response to temperature changes may result in delayed readings.
Digital Thermometers With or Without Probe:
Description:
- Digital thermometers feature an electronic sensor that measures temperature and displays the readings digitally.
- Some models come with a separate probe for measuring temperature at specific locations within the incubator.
Pros:
- Precise and accurate temperature readings.
- Rapid response to temperature changes.
- Some models offer features such as high/low temperature alarms and memory recall.
Cons:
- Reliance on batteries, which may require periodic replacement.
- Probes may need calibration to ensure accuracy.
Infrared Thermometers:
Description:
- Infrared thermometers measure temperature by detecting infrared energy emitted by objects.
- They provide non-contact temperature measurements, making them suitable for quick spot checks of surface temperatures.
Pros:
- Non-contact measurement reduces the risk of contamination.
- Instantaneous readings without the need for probes or sensors.
- Suitable for monitoring temperature gradients within the incubator.
Cons:
- Limited to surface temperature measurements.
- Accuracy may be affected by factors such as distance and surface reflectivity.
5. Heating Elements for Incubators:
Selecting the appropriate heating element is crucial for maintaining consistent and optimal temperatures within an incubator. Different heating elements offer varying levels of control, efficiency, and suitability for specific incubation setups. Here’s an in-depth look at the various heating elements commonly used in incubators:
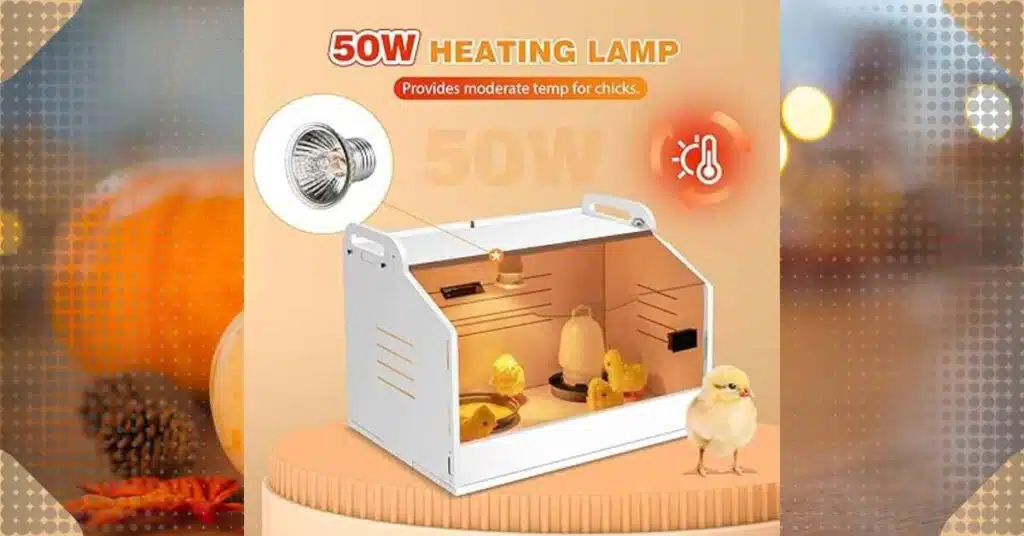
Heat Bulb / Ceramic Heat Emitter:
Description:
- Heat bulbs or ceramic heat emitters produce radiant heat, warming the air and surfaces within the incubator.
- They come in various wattages and sizes to accommodate different incubator sizes and temperature requirements.
Pros:
- Generates uniform heat distribution throughout the incubator.
- Suitable for creating a warm environment without drying out the air.
- Compatible with most thermostat systems for precise temperature regulation.
Cons:
- Consumes more energy compared to other heating elements.
- Requires regular replacement due to bulb lifespan.
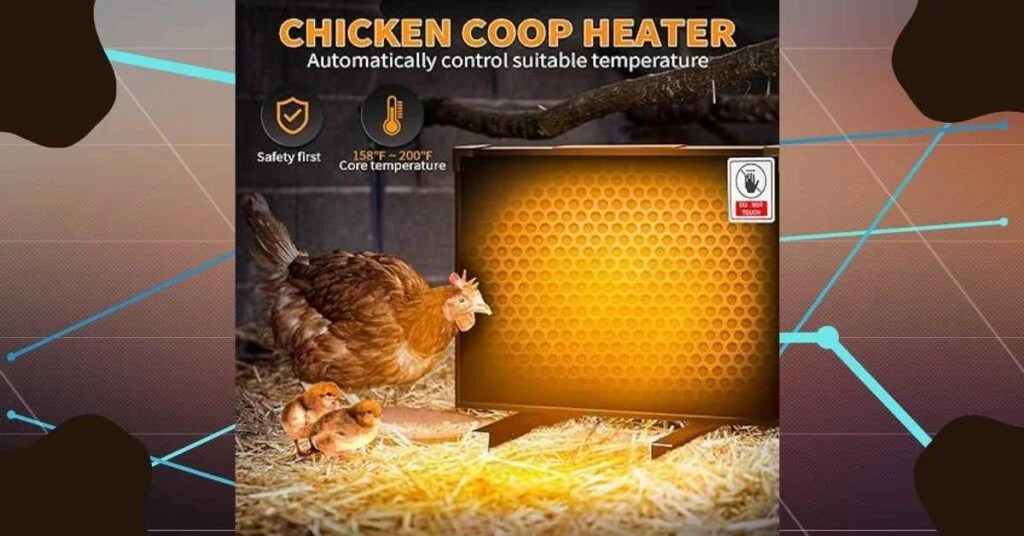
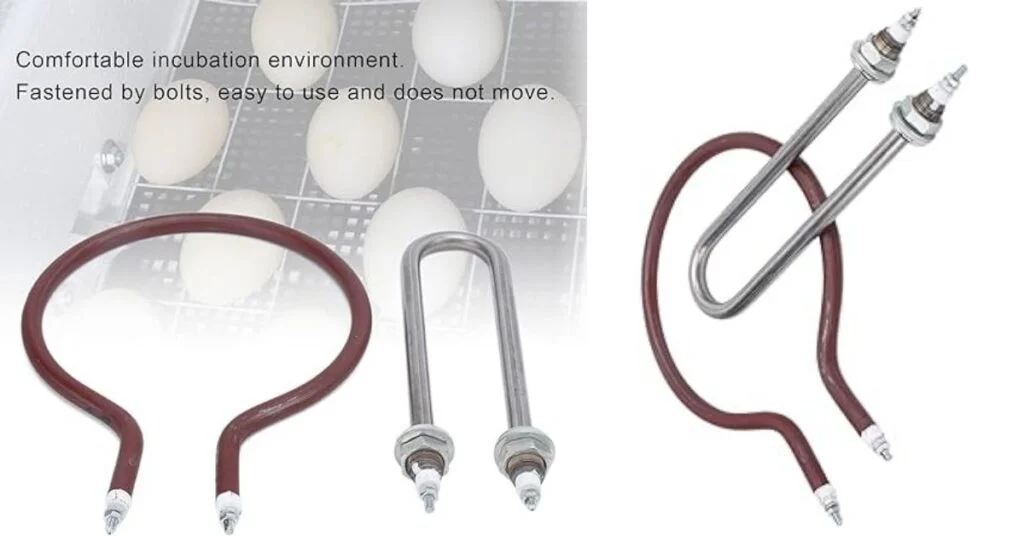
- Heat Cable:
Description:
- Heat cables consist of a flexible heating element encased in a protective sheath.
- They can be wound around or placed beneath incubator trays to provide consistent bottom heat.
- Pros:
- Offers precise temperature control by adjusting the length of the cable or the power supplied.
- Efficient heat transfer directly to eggs or incubator trays.
- Suitable for large-scale incubators or specialized setups requiring bottom heat.
Cons:
- Installation may require careful positioning and insulation to prevent hot spots or uneven heating.
- Limited to providing heat from a single direction, requiring additional heat sources for uniform warming.
Heat Tape (Snake Rack Heaters):
Description:
- Heat tape, also known as snake rack heaters, consists of a flexible heating element attached to a self-adhesive backing.
- It can be affixed to the sides or bottom of an incubator to provide consistent warmth.
- Pros:
- Flexible and easy to install in various configurations.
- Efficient heat distribution across the surface area of the tape.
- Suitable for custom-built or repurposed incubators with limited space.
Cons:
- May require careful monitoring to prevent overheating or hot spots.
- Limited to providing heat from the sides or bottom, requiring additional heating elements for overhead warmth if necessary.
6. Construction and Setup of DIY Incubators:
Constructing a DIY incubator requires careful planning and attention to detail to ensure optimal conditions for egg incubation. From selecting the appropriate container to installing essential components, here’s a comprehensive guide to the construction and setup process:
Basic Construction:
Container Selection:
- Choose a suitable container based on the incubator size needed and available materials.
- Ensure the container is well-insulated to maintain stable temperature levels.
- Common options include insulated coolers, styrofoam boxes, or repurposed refrigerators/freezers.
Ventilation:
- Drill small holes or install vents to allow for proper air circulation within the incubator.
- Position vents strategically to prevent heat buildup and ensure consistent airflow.
Sealing:
- Seal any gaps or openings in the container to prevent heat loss and maintain temperature stability.
- Use weather-stripping, silicone sealant, or adhesive tape to seal seams and edges effectively.
Adding The Heating Element:
Placement:
- Position the heating element (e.g., heat bulb, heat cable, or heat tape) according to the incubator’s design and size.
- Ensure the heating element is evenly distributed to provide uniform warmth throughout the incubator.
Thermostat Integration:
- Install the thermostat in a central location within the incubator for accurate temperature monitoring and control.
- Connect the thermostat to the heating element according to the manufacturer’s instructions.
Adding The Thermometer:
Selection:
- Choose a thermometer suitable for measuring the temperature range required for egg incubation.
- Consider using digital thermometers for precise readings or analog thermometers for simplicity.
Placement:
- Position the thermometer at egg level within the incubator for accurate temperature monitoring.
- Ensure the thermometer is easily visible and accessible for regular checks.
Adding The Thermostat’s Probe:
Probe Placement:
- Place the thermostat’s temperature probe in close proximity to the eggs to monitor the incubation temperature accurately.
- Secure the probe in place to prevent movement or displacement during operation.
Calibration:
- Calibrate the thermostat and temperature probe according to the manufacturer’s instructions to ensure accuracy.
- Verify the temperature readings by comparing them to a known reference thermometer.
7. Battery-Powered Incubator Operation:
Battery-powered incubators offer flexibility and resilience in environments where access to electricity may be limited or unreliable. Understanding how to effectively operate a battery-powered incubator is essential for maintaining optimal conditions for egg incubation. Here’s a detailed guide on the operation of battery-powered incubators:
Power Source Selection:
Battery Type:
- Choose a suitable battery type based on capacity, voltage requirements, and expected runtime.
- Common options include rechargeable lead-acid batteries, lithium-ion batteries, or deep cycle marine batteries.
Backup Power:
- Ensure sufficient backup power capacity to sustain incubator operation during power outages or disruptions.
- Consider using multiple batteries or a backup generator for extended runtime requirements.
Battery Management:
Charging:
- Regularly charge the batteries using a compatible charger to maintain optimal performance and longevity.
- Follow manufacturer recommendations for charging cycles and voltage settings to avoid overcharging or undercharging.
Monitoring:
- Monitor battery voltage levels regularly to ensure adequate power reserves for continued operation.
- Use a voltmeter or battery monitor to track battery status and anticipate recharging needs.
Temperature Control:
Thermostat Settings:
- Set the thermostat to the desired temperature range for egg incubation, taking into account the incubator’s insulation and external temperature fluctuations.
- Monitor temperature closely and adjust thermostat settings as needed to maintain stable conditions.
Heat Source Management:
- Monitor the performance of the heating element powered by the battery to ensure consistent warmth within the incubator.
- Check for any signs of overheating or malfunction and address issues promptly to prevent damage to eggs.
Humidity Regulation:
Water Management:
- Monitor water levels in the incubator’s humidity reservoir and replenish as needed to maintain optimal humidity levels.
- Adjust humidity settings based on egg requirements and environmental conditions to prevent dehydration or excess moisture.
Ventilation:
- Ensure proper ventilation within the incubator to prevent moisture buildup and maintain air circulation.
- Monitor humidity levels regularly and adjust ventilation settings as needed to achieve the desired humidity range.
8. Importance of Battery Backup for Lab Incubators:

Lab incubators play a crucial role in various scientific and research settings, providing controlled environments for the cultivation and study of biological samples. Ensuring a constant power supply is essential to protect valuable samples and maintain experimental integrity. Here’s an in-depth exploration of the importance of battery backup for lab incubators:
WHAT IS A LAB INCUBATOR?
Definition:
A lab incubator is a temperature-controlled chamber used to culture and grow biological samples under controlled conditions.
It provides a stable environment with precise temperature and humidity control to support cell growth, microbial cultures, and other biological processes.
Types:
Common types of lab incubators include gravity convection incubators, mechanical convection incubators, and CO2 incubators, each designed for specific applications and temperature requirements.
WHY BATTERY BACKUP IS CRUCIAL:
Sample Protection:
Battery backup ensures continuous operation of lab incubators during power outages or fluctuations, preventing temperature fluctuations that could compromise sample viability.
Maintaining stable incubation conditions is critical for preserving valuable samples and preventing experimental failures.
Data Integrity:
Power interruptions can disrupt data logging and monitoring systems integrated into lab incubators, leading to gaps in data and potential loss of experimental results.
Battery backup systems ensure uninterrupted data logging and monitoring, preserving experimental integrity and facilitating data analysis.
WAYS TO ENSURE PROTECTION OF LAB INCUBATOR BATTERY BACKUP POWER SUPPLY AND SAMPLES:
Battery Backup Systems:
Install battery backup systems, such as uninterruptible power supplies (UPS) or backup generators, to provide immediate power backup in the event of a power outage.
Choose UPS systems with sufficient capacity to support the power requirements of lab incubators and associated equipment for the desired duration.
Automatic Switchover:
Configure battery backup systems to automatically switch over to battery power in the event of a power outage, ensuring seamless continuity of incubator operation without manual intervention.
Implement alarms or notifications to alert laboratory staff of power disruptions and battery status to facilitate timely response and maintenance.
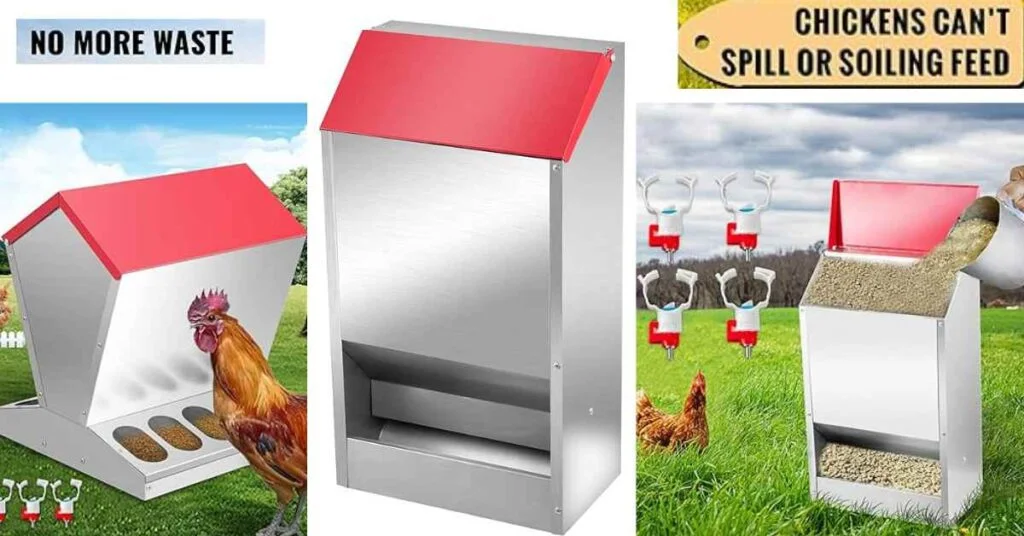
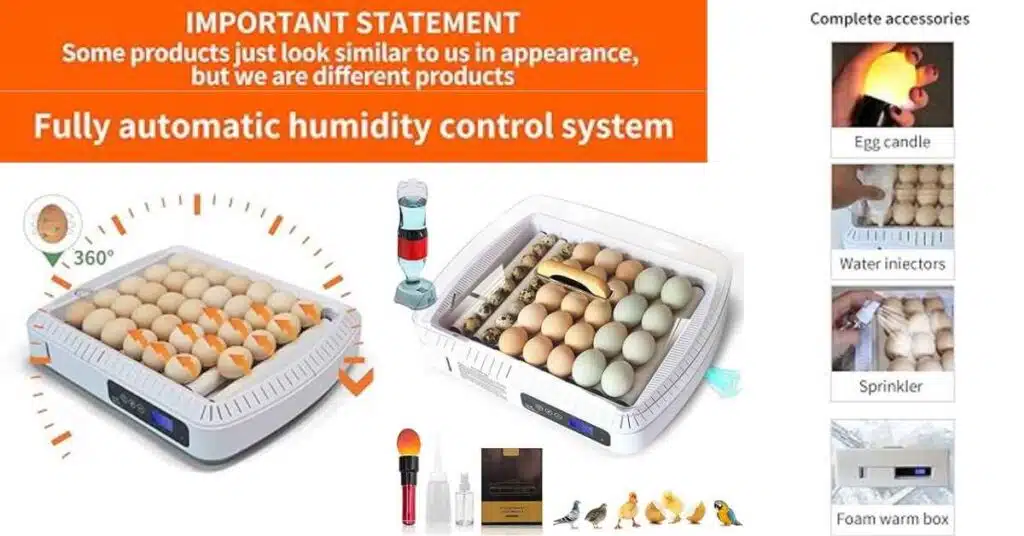
9. Utilizing Poultry Style Incubators:
Poultry style incubators offer a convenient and efficient solution for hatching eggs on farms, hatcheries, or in backyard poultry operations. These incubators are specifically designed to accommodate large quantities of eggs while maintaining optimal conditions for successful hatching. Here’s a detailed exploration of the utilization of poultry style incubators:
Design and Features:
Capacity:
Poultry style incubators come in various sizes to accommodate different flock sizes and production needs.
Capacities range from small-scale units capable of hatching a few dozen eggs to commercial-grade models capable of hatching hundreds or even thousands of eggs simultaneously.
Temperature and Humidity Control:
These incubators feature built-in temperature and humidity control systems, typically consisting of thermostats, heaters, and humidity trays.
Precise temperature and humidity regulation ensure optimal conditions for embryo development and hatchability.
Operation and Management:
Loading Eggs:
Eggs are loaded onto trays or racks within the incubator, arranged carefully to ensure proper airflow and heat distribution.
Egg turning mechanisms may be manual or automatic, facilitating even embryo development and preventing deformities.
Monitoring and Maintenance:
Regular monitoring of temperature, humidity, and egg turning is essential to ensure successful incubation.
Maintenance tasks include cleaning and sanitizing the incubator between hatches, calibrating temperature and humidity sensors, and inspecting for any signs of malfunction.
Hatch Management:
Candling:
Candling involves shining a bright light through the egg to observe embryo development and detect any abnormalities or fertility issues.
Regular candling throughout the incubation period helps assess egg viability and identify potential problems early on.
Hatch Day Preparation:
As hatch day approaches, adjustments may be made to temperature and humidity settings to facilitate hatching.
Preparation includes ensuring adequate space for newly hatched chicks to move freely and providing appropriate bedding and heat sources in the brooder area.
10. Conclusion:
In conclusion, poultry style incubators represent a cornerstone of efficient egg hatching in poultry production operations. With their capacity to accommodate large quantities of eggs while ensuring precise temperature and humidity control, these incubators streamline the hatching process and maximize hatch rates.
By incorporating features such as automatic egg turning and built-in monitoring systems, poultry style incubators offer convenience and reliability for poultry enthusiasts and commercial hatcheries alike. However, successful incubation still requires diligent operation, monitoring, and maintenance to ensure optimal conditions for embryo development and hatchability.
With proper management, poultry style incubators continue to play a pivotal role in sustaining poultry production and supporting the growth of backyard poultry operations worldwide.
11. Frequently Asked Questions (FAQs) about Poultry Style Incubators:
What capacity options are available for poultry style incubators?
Poultry style incubators come in various sizes, ranging from small-scale units capable of hatching a few dozen eggs to commercial-grade models with capacities to hatch hundreds or even thousands of eggs simultaneously.
How do poultry style incubators maintain optimal temperature and humidity levels?
Poultry style incubators typically feature built-in temperature and humidity control systems, including thermostats, heaters, and humidity trays. These systems work together to regulate environmental conditions conducive to embryo development.
What is the importance of egg turning in poultry style incubators?
Egg turning helps ensure even embryo development by preventing the embryo from sticking to the shell membrane and promoting proper circulation of nutrients and gases within the egg. Many poultry style incubators come equipped with automatic egg turning mechanisms to facilitate this process.
How often should I monitor the incubator during the incubation process?
Regular monitoring of temperature, humidity, and egg turning is essential throughout the entire incubation period. Depending on the specific requirements of the eggs being incubated, monitoring may occur multiple times per day to maintain optimal conditions.
What is candling, and why is it important during egg incubation?
Candling involves shining a bright light through the egg to observe embryo development and detect any abnormalities or fertility issues. Regular candling throughout the incubation period helps assess egg viability and identify potential problems early on.
How should I prepare for hatch day with a poultry style incubator?
As hatch day approaches, adjustments may be made to temperature and humidity settings to facilitate hatching. Additionally, ensure adequate space for newly hatched chicks to move freely and provide appropriate bedding and heat sources in the brooder area.
Are there any maintenance tasks required for poultry style incubators?
Yes, regular maintenance tasks include cleaning and sanitizing the incubator between hatches, calibrating temperature and humidity sensors, and inspecting for any signs of malfunction. Proper maintenance helps ensure the continued reliability and efficiency of the incubator.